
Business
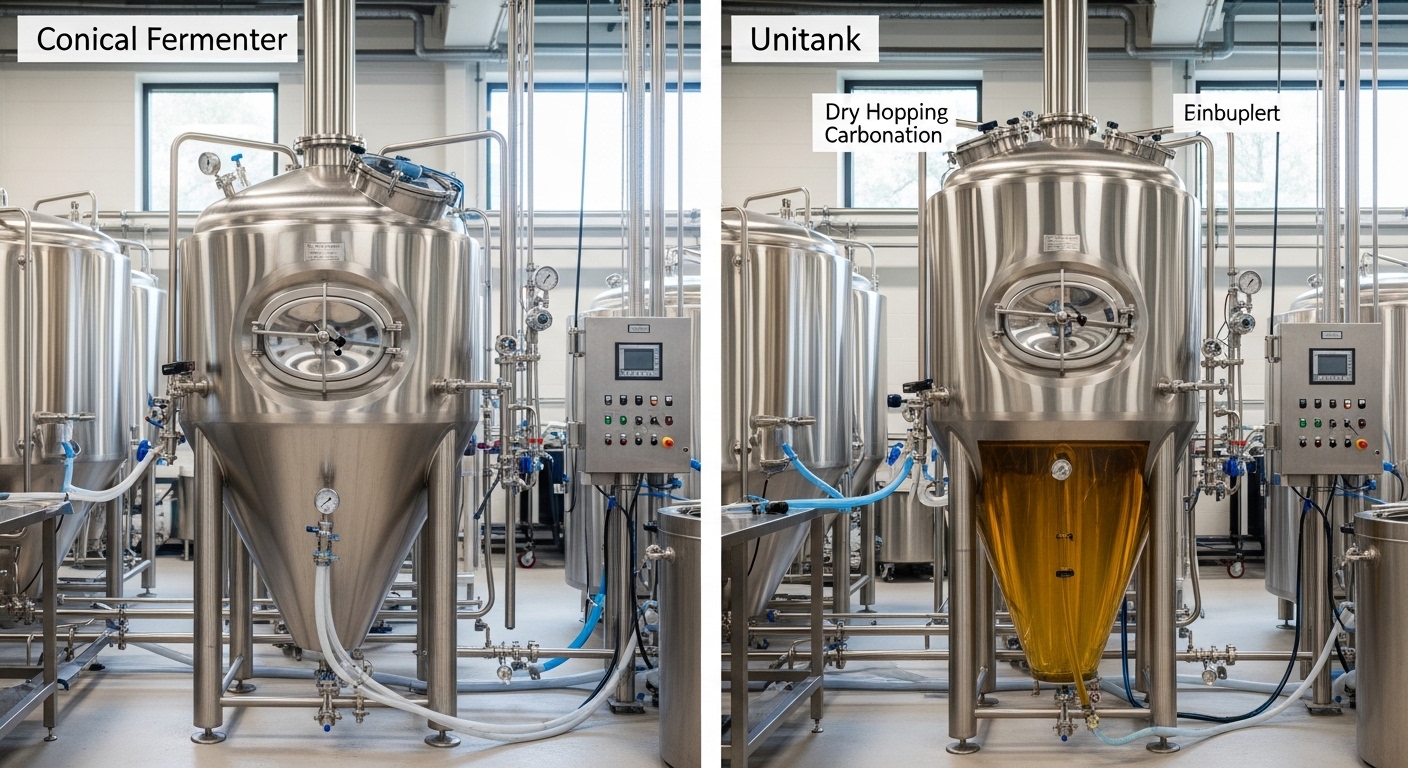
Conical Fermenter vs. Unitank: What’s the Difference?
In the evolving landscape of craft brewing, the equipment used for fermentation is just as vital as the ingredients in the recipe. For decades, the stainless steel conical vessel has been the industry standard, replacing the open fermentation vats and flat-bottomed plastic buckets of the past. However, as brewing technology has advanced, a more specialized version of the conical vessel has emerged: the Unitank.
To the untrained eye, a standard conical fermenter and a Unitank look nearly identical. Both are tall, cylindrical stainless steel tanks with a cone-shaped bottom. Yet, for a professional brewer or a serious enthusiast, the technical differences between these two vessels represent two distinct operational philosophies. Understanding whether you need a traditional conical fermenter or a multi-purpose Unitank is a decision that affects your budget, your cellar space, and the clarity of your final beer.
The Fundamentals of Conical Design
Before diving into the differences, it is important to understand why the “conical” shape is the preferred geometry for modern brewing. Historically, fermenters were often wide and flat. This made it difficult to remove yeast and sediment without transferring the beer to a secondary vessel.
The introduction of the $60^\circ$ cone at the bottom of the tank changed everything. This specific angle allows yeast, hops, and proteins (collectively known as trub) to settle into a compact “plug” at the very bottom of the vessel. This geometry allows the brewer to “dump” the trub or harvest healthy yeast for the next batch through a bottom valve, all while the beer remains protected inside the tank.
Defining the Standard Conical Fermenter
A standard conical fermenter is designed primarily for the “primary” stage of fermentation. Its main job is to hold the wort while the yeast converts sugars into alcohol and carbon dioxide.
Pressure Ratings and Construction
Traditional conical fermenters are often “atmospheric” or low-pressure vessels. They are designed to hold the weight of the liquid, but they are not necessarily built to withstand high internal pressure. Most standard fermenters use a simple “breather” or a blow-off arm to allow $CO_2$ to escape safely during the vigorous phase of fermentation.
The Role in a Two-Vessel Cellar
In a brewery using standard conicals, the process is usually split. The beer ferments in the conical, and once fermentation is complete and the yeast has been dropped, the beer is transferred (racked) into a separate vessel called a Bright Beer Tank (BBT). It is in the Bright Tank that the beer is chilled, clarified, and artificially carbonated for packaging.
Advantages of Standard Conicals
- Cost-Effectiveness:Because they do not require high-pressure certification or heavy-duty reinforcement, standard conicals are generally more affordable.
- Specialization:By moving beer out of the fermenter and into a Bright Tank, you free up the fermenter for the next batch, potentially increasing your brewery’s throughput if you have enough BBTs.
Defining the Unitank
The term “Unitank” is a portmanteau of “Universal Tank.” As the name suggests, this vessel is designed to perform the functions of both a fermenter and a Bright Beer Tank in a single footprint.
High-Pressure Capabilities
The defining characteristic of a Unitank is its pressure rating. While a standard conical might only handle $1$ or $2$ PSI, a Unitank is typically rated for $15$ to $30$ PSI. This allows the brewer to seal the tank toward the end of fermentation, trapping the $CO_2$ produced by the yeast to naturally carbonate the beer—a process known as “spunding.”
Specialized Hardware
A Unitank comes equipped with features you won’t typically find on a standard conical:
- Carbonation Stone:A fine-pored stainless steel stone used to inject $CO_2$ directly into the beer for rapid carbonation.
- Pressure Relief Valve (PRV):An essential safety feature to manage the high pressures within the tank.
- Reinforced Manways:The doors and seals on a Unitank are much heavier to prevent leaks under pressure.
Advantages of the Unitank System
- Reduced Risk of Oxidation:Every time you move beer from one tank to another, you risk exposing it to oxygen. In a Unitank, the beer stays in the same environment from the moment it is knocked out until it is kegged or canned.
- Space Saving:For small breweries or brewpubs with limited square footage, a Unitank eliminates the need for separate Bright Tanks, effectively doubling the utility of a single cellar spot.
Key Technical Differences
While the appearance is similar, the engineering requirements for a Unitank are significantly more rigorous.
1. Cooling and Insulation
Because a Unitank is used for “crashing” (dropping the temperature of the beer to near-freezing for clarification), it requires more robust cooling jackets. While a standard conical only needs to keep beer at fermentation temperatures (roughly $18^\circ\text{C}$ to $22^\circ\text{C}$), a Unitank must be able to pull the temperature down to $0^\circ\text{C}$ or even $-1^\circ\text{C}$ and hold it there efficiently. This usually means thicker polyurethane insulation and multi-zone glycol jackets on both the cone and the sidewalls.
2. Carbonation Management
A standard conical is not built to hold carbonation. If you tried to carbonate beer in an atmospheric tank, you would likely blow the seals or, in extreme cases, deform the tank. The Unitank’s ability to use a carb stone means you can have “package-ready” beer directly from the fermenter. This is particularly useful for hop-forward styles like Hazy IPAs, where freshness and the absence of oxygen are paramount.
3. Yeast Harvesting
In both tanks, yeast can be harvested from the bottom. However, because a Unitank is under pressure, harvesting yeast requires specialized techniques and equipment to ensure the yeast isn’t damaged by the sudden pressure drop when it leaves the tank.
Operational Workflow: Conical vs. Unitank
To choose the right tank, you must look at how your brew day and cellar schedule will function.
The Two-Step (Conical + BBT)
In this workflow, your beer spends $10$ to $14$ days in the conical. Once it reaches terminal gravity, you drop the yeast and pump the beer to a Bright Tank.
- Pro:The Bright Tank provides a very clear “finished” product because you are leaving all the sediment behind in the fermenter.
- Con:You have more equipment to clean (two tanks instead of one) and a higher chance of oxygen pick-up during the transfer.
The One-Step (Unitank)
The beer ferments, crashes, and carbonates in the same vessel.
- Pro:It is a “set it and forget it” process that keeps the beer incredibly fresh.
- Con:The tank is tied up for a longer period (usually $18$ to $21$ days), which means you might need more Unitanks to maintain the same production volume as a Conical + BBT setup.
Material Quality and Sanitary Design
Regardless of which vessel you choose, the quality of the stainless steel is non-negotiable. Both Conicals and Unitanks should be constructed from 304 or 316L Food Grade Stainless Steel.
The interior finish should be polished to at least a $0.4\mu\text{m}$ Ra finish. This “mirror finish” ensures that there are no microscopic pits where bacteria or wild yeast can hide. In a Unitank, this is even more critical because the beer will be sitting in the tank for a longer duration, and any contamination will have more time to ruin the batch.
Cost Analysis: Initial Investment vs. ROI
A Unitank will almost always have a higher price tag than a standard conical of the same volume—often $20\%$ to $40\%$ more expensive. This is due to the thicker steel required for pressure ratings, the extra welding for the jackets, and the cost of the additional valves and stones.
However, the Return on Investment (ROI) for a Unitank can be higher for many small businesses. By eliminating the need for a separate Bright Tank, you save on:
- The cost of the Bright Tank itself.
- The floor space (rent/real estate).
- The labor costs associated with transferring and cleaning an extra vessel.
- The potential loss of beer (shrinkage) that occurs during every transfer.
Which One Should You Choose?
The Case for Conical Fermenters
If you are running a production-focused brewery where you are brewing the same flagship beers over and over, a dedicated Conical + Bright Tank setup is often the most efficient. It allows you to use your fermenters solely for fermentation, moving beer out as soon as it is done to make room for the next brew.
The Case for Unitanks
If you are a craft brewpub, a nano-brewery, or a producer of heavily dry-hopped IPAs and delicate Lagers, Unitanks are almost certainly the better choice. The flexibility to ferment, age, and carbonate in one place is an enormous advantage for smaller teams and quality-focused brewers.
Elevate Your Cellar with Micet
When it comes to high-performance fermentation vessels, Micet is a global leader in stainless steel engineering. Whether you require the simplicity of a standard conical fermenter or the advanced multi-functionality of a professional Unitank, Micet provides the precision and durability that modern brewers demand.
Micet’s tanks are built to exceed international standards, featuring:
- Precision Pressure Ratings:Their Unitanks are engineered to handle high pressures, allowing for natural carbonation and pressurized transfers.
- Advanced Cooling Technology:Dimpled glycol jackets ensure rapid temperature crashes and stable fermentation environments.
- Sanitary Excellence:All tanks feature $360^\circ$ coverage CIP spray balls and ultra-smooth interior finishes to guarantee a sterile environment for your yeast.
- Customization:Micet works with you to place ports, manways, and sensors exactly where you need them for your specific workflow.
From $1\text{BBL}$ pilot systems to $100\text{BBL}$ production cellars, Micet’s equipment is designed to grow with your business and help you produce the best beer of your career.
Frequently Asked Questions
1. Can I carbonate beer in a standard conical fermenter?
Generally, no. Most standard conicals are not rated for the pressures required to carbonate beer (usually around $10$ to $12$ PSI for standard carbonation). Trying to do so can be dangerous and may permanently damage the tank. If you intend to carbonate in the fermenter, you must purchase a certified Unitank.
2. Is beer clearer in a Bright Tank compared to a Unitank?
Historically, Bright Tanks were thought to produce clearer beer because the beer is physically removed from the sediment at the bottom of the fermenter. However, with a properly designed Unitank from a manufacturer like Micet, the $60^\circ$ cone is so effective at concentrating trub that, when combined with a cold crash, the clarity is virtually indistinguishable from beer clarified in a Bright Tank.
3. Do I need a carbonation stone for a Unitank?
While you can naturally carbonate in a Unitank by sealing it before fermentation is finished, a carbonation stone is highly recommended. It gives you much finer control over the final volumes of $CO_2$ and allows you to “top up” the carbonation quickly if the beer isn’t quite where you want it to be before kegging.
If you’ve ever walked into a spray tan Jax Beach for the first time, you probably noticed something right away—there’s not just one tanning bed.
There are levels. Packages. Names that sound fancy but don’t always explain much.
And suddenly, what started as a simple search for “tanning near me” turns into standing at the front desk thinking… Wait, which one am I even supposed to choose?
Yeah, you’re not alone.
The truth is, tanning beds range from very basic to pretty advanced, and each one works a little differently depending on your skin type, your goals, and honestly—how fast you want to see results.
Let’s break it down in a way that actually makes sense.
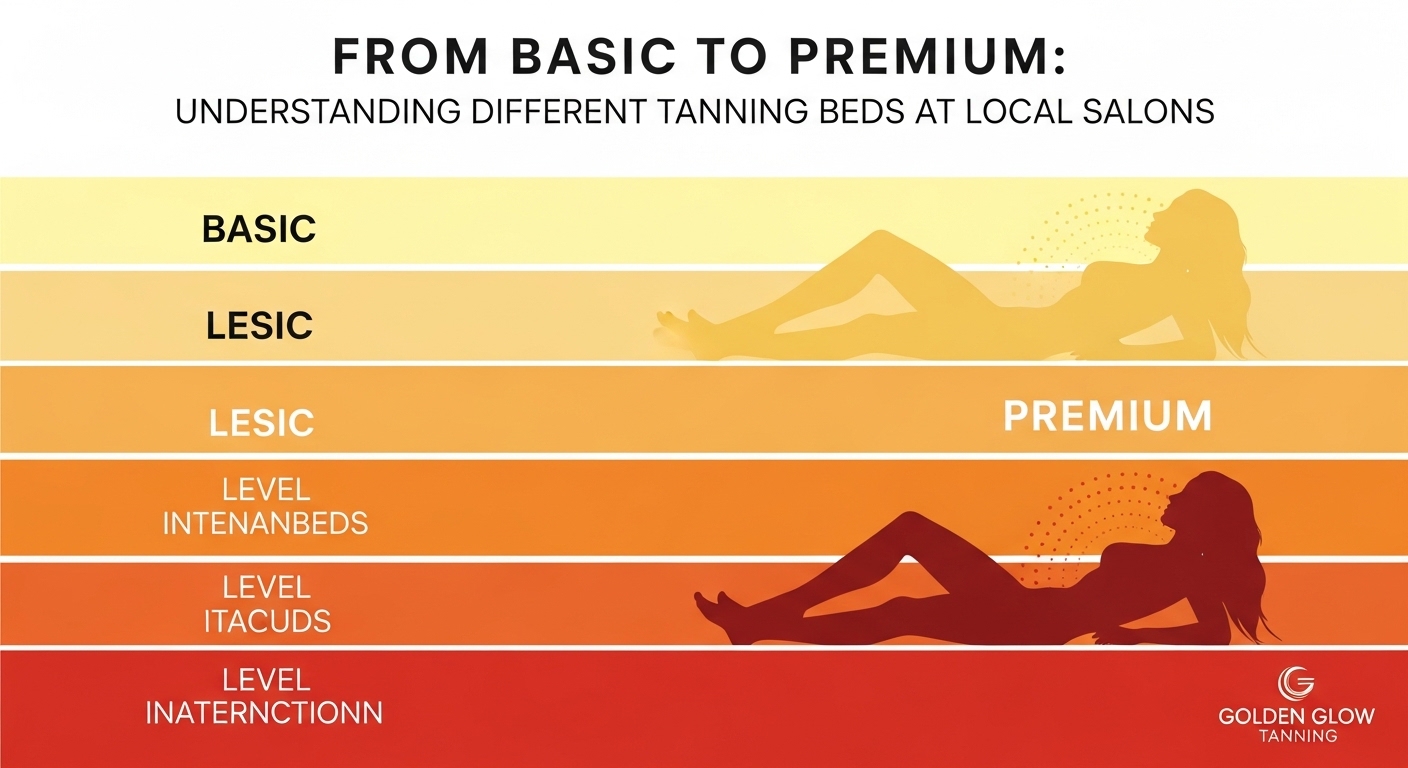
The Basic Level: Where Most People Start
Basic tanning beds are usually the entry-level option in any tanning salon.
They’re designed for beginners or for people who prefer a slower, more gradual tan. The UV intensity is lower, which means sessions are typically a bit longer—around 15 to 20 minutes.
If you’ve been searching “spray tan Jacksonville FL” and thinking about trying indoor tanning for the first time, this is probably where you’ll start.
And honestly, that’s a good thing.
These beds allow your skin to build a base tan slowly, which helps reduce the risk of burning (especially if your skin is on the fair side). It’s not dramatic. You won’t walk out looking like you just came back from a beach vacation.
But after a few sessions? You’ll notice the difference.
Subtle, even color. The kind that looks natural.
Mid-Level Beds: Faster Results, Stronger Output
Once people get a feel for tanning, they often move up to mid-level beds.
These beds use stronger UV lamps, which means shorter sessions—usually around 10 to 15 minutes. You’ll start seeing results faster compared to basic beds.
This is where things start to feel a little more… efficient.
If you’re someone who searched “tanning near me” because you have an event coming up—maybe a wedding, a vacation, or even just a weekend out—mid-level beds can help speed things along.
But here’s the catch.
Stronger doesn’t always mean better. It just means faster. And if your skin isn’t used to it, jumping straight into higher-level beds can backfire.
A good tanning salon will guide you here. They won’t push you into a stronger bed unless your skin is ready for it.
High-Pressure (Premium) Beds: The “Luxury” Option
Now we’re getting into premium territory.
High-pressure tanning beds are often marketed as the top-tier experience—and honestly, they kind of are. These beds use a different combination of UVA and UVB rays, focusing more on deeper tanning with less surface burning.
Sessions are shorter, sometimes as quick as 8 to 12 minutes.
And the results?
They tend to last longer and develop more evenly.
People who regularly search for “tanning bed Jacksonville FL” and go frequently often end up here because it’s efficient. Fewer sessions, longer-lasting color.
But—and this is important—it’s not necessary for everyone.
If you’re new, this level can feel like jumping into the deep end. It’s better suited for experienced tanners who already understand how their skin reacts.
Stand-Up Booths: A Different Kind of Experience
Not all tanning happens lying down.
Stand-up booths are another option you’ll see in many salons. Instead of lying in a bed, you stand inside a vertical unit while UV lights surround you.
Some people actually prefer this.
Why?
- No pressure points (so fewer tan lines)
- More even exposure
- Shorter sessions
If you’ve been hopping between different options while searching “tanning near me,” this might be worth trying at least once.
It feels a little different at first—but many people end up loving it.
Where Spray Tanning Fits In
Now, let’s pause for a second—because not everyone wants UV tanning.
That’s where options like spray tan come in.
Spray tanning doesn’t use UV light at all. Instead, it applies a fine mist that reacts with your skin to create a bronzed look.
It’s quick. It’s predictable. And there’s zero risk of UV exposure.
A lot of people actually combine both approaches. They might use tanning beds occasionally but rely on spray tans for events or when they want instant color.
So if you’re walking into a tanning salon, don’t assume you’re limited to beds. You’ve got options.
Which One Should You Choose?
This is the part everyone wants a clear answer to—but it’s a little personal.
If you’re brand new:
Start with a basic bed. No rush. Let your skin adjust.
If you want faster results:
Try mid-level beds—but ease into them.
If you’re experienced:
Premium beds can give you longer-lasting color with fewer sessions.
If you want no UV exposure:
Go for spray tanning options.
Final Thoughts
Tanning isn’t one-size-fits-all. And honestly, that’s why so many people feel confused at first.
You walk in thinking it’s simple… and suddenly there are levels, beds, booths, and packages.
But once you understand the difference between basic and premium options, it all starts to click.
So the next time you search “tanning near me” or consider booking a tanning bed Jacksonville FL session, you’ll know exactly what you’re looking at—and more importantly, what your skin actually needs.
And that makes the whole experience a lot better.
FAQs
- What is the difference between basic and premium tanning beds?
Basic beds use lower UV intensity and require longer sessions, while premium beds use stronger or more advanced light systems for faster, longer-lasting results.
- Are high-pressure tanning beds safer?
They can reduce the risk of surface burning due to higher UVA levels, but they still involve UV exposure. Proper usage and moderation are key.
- Is spray tanning better than tanning beds?
It depends on your preference. Options like spray tan Jacksonville FL provide instant color without UV exposure, while tanning beds gradually develop a natural tan.
- How often should I use a tanning bed?
Most beginners start with 2–3 sessions per week. Frequency depends on your skin type and the bed level you’re using.
- Can I switch between different tanning bed levels?
Yes, many people move from basic to higher-level beds over time. Ju
In today’s rapidly evolving industrial landscape, drone technology is transforming how businesses conduct inspections. From infrastructure and energy to construction and agriculture, companies are increasingly relying on advanced aerial systems to improve efficiency, safety, and accuracy. However, selecting the right autonomous drone inspection system provider can be a challenging task, especially with so many options available in the market.
Choosing the right partner is critical because it directly impacts the quality of data, operational efficiency, and overall return on investment. In this guide, we will walk you through the key factors to consider when selecting the best provider for your business needs.
1. Understand Your Business Requirements
Before evaluating any autonomous drone inspection system provider, you must clearly define your specific needs. Different industries have different inspection requirements, such as:
- Power line and utility inspections
- Oil and gas pipeline monitoring
- Construction site progress tracking
- Wind turbine and solar panel inspections
- Infrastructure and bridge assessments
Understanding your objectives will help you identify whether you need high-resolution imaging, thermal scanning, LiDAR capabilities, or AI-powered analytics. A reliable provider should offer customized solutions tailored to your industry.
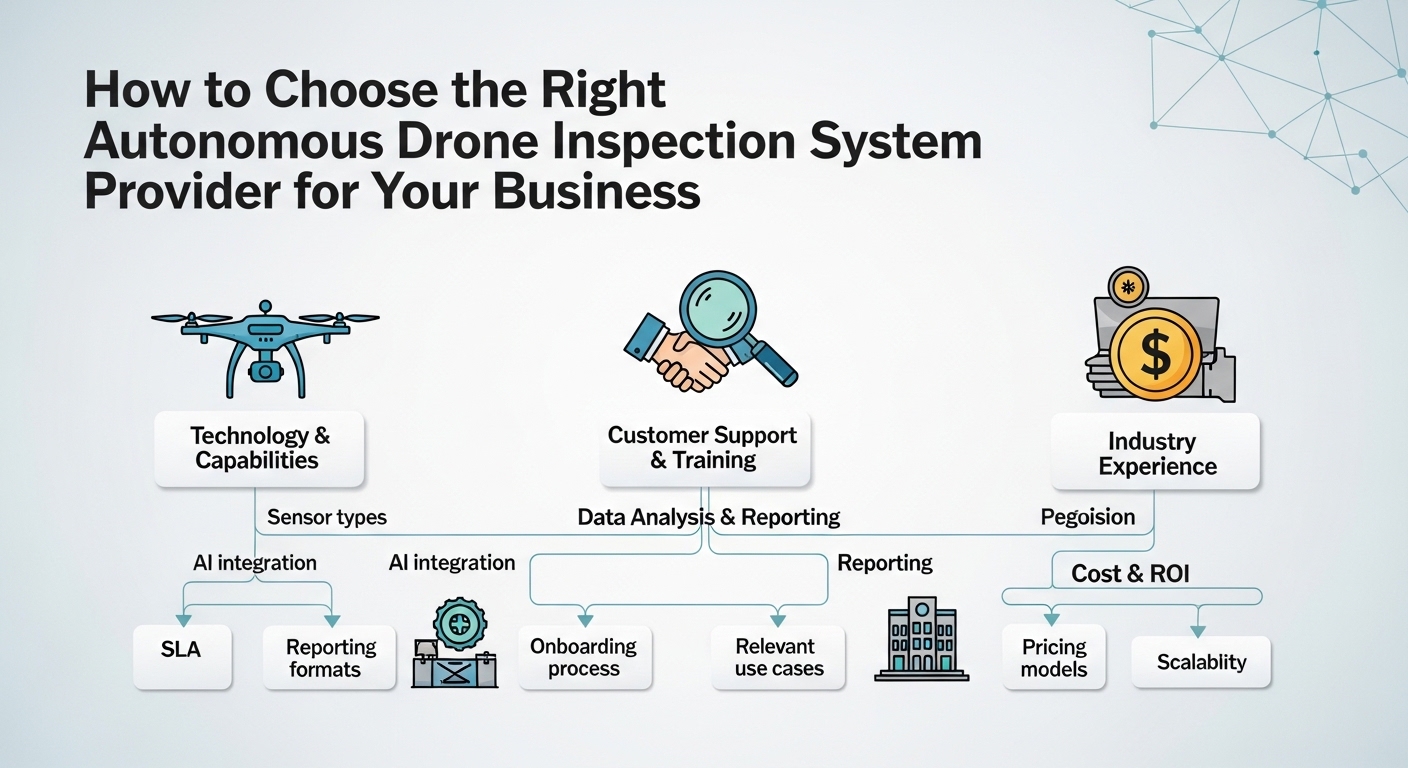
2. Look for Industry Experience and Expertise
Experience matters when it comes to drone inspection services. An established autonomous drone inspection system provider will have a proven track record across multiple industries. Look for:
- Case studies and past projects
- Industry-specific expertise
- Client testimonials
- Portfolio of successful inspections
Providers with deep experience can better anticipate challenges and deliver more accurate, actionable insights. They also tend to have refined workflows and optimized systems for efficient operations.
3. Verify Certifications and Compliance
One of the most important factors to consider is whether the provider is an aviation certified UAV inspection company. Certification ensures that the company complies with aviation regulations and safety standards.
Key certifications and compliance checks include:
- Civil aviation authority approvals
- Licensed drone pilots
- Safety and risk management protocols
- Insurance coverage
Working with an aviation certified UAV inspection company minimizes risks and ensures that your inspection operations are legally compliant and professionally executed.
4. Evaluate Technology and Equipment
Not all drone systems are created equal. The technology used by an autonomous drone inspection system provider plays a crucial role in the quality of results.
Consider the following:
- Type of drones (fixed-wing, multirotor, hybrid)
- Sensor capabilities (thermal, LiDAR, multispectral, HD cameras)
- AI and automation features
- Real-time data transmission and processing
Advanced providers invest in cutting-edge technologies that enable autonomous flight, obstacle avoidance, and precise data collection. This ensures higher accuracy and reduced human intervention.
5. Assess Data Processing and Analytics Capabilities
Collecting data is only half the job—the real value lies in how that data is processed and analyzed. A reliable autonomous drone inspection system provider should offer:
- Cloud-based data storage
- AI-powered analytics
- Detailed inspection reports
- Predictive maintenance insights
- Integration with existing systems
An aviation certified UAV inspection company with strong analytics capabilities can help you make informed decisions, reduce downtime, and optimize asset performance.
6. Consider Safety Standards and Protocols
Safety is a critical aspect of drone operations. A professional autonomous drone inspection system provider will follow strict safety protocols to protect people, property, and assets.
Look for:
- Pre-flight risk assessments
- Emergency response procedures
- Collision avoidance systems
- Secure data handling practices
Choosing an aviation certified UAV inspection company ensures that safety is embedded in every stage of the inspection process.
7. Check Scalability and Flexibility
As your business grows, your inspection needs may evolve. It’s important to partner with an autonomous drone inspection system provider that can scale its services accordingly.
Ask questions like:
- Can they handle large-scale projects?
- Do they offer flexible service packages?
- Can they adapt to new technologies and requirements?
A scalable provider will support your long-term growth and help you stay ahead of industry trends.
8. Review Cost vs Value
While cost is an important consideration, it should not be the sole deciding factor. The cheapest option may not always deliver the best results.
Instead, evaluate:
- Quality of service
- Technology and tools used
- Expertise and certifications
- Long-term benefits and ROI
An experienced autonomous drone inspection system provider may charge more, but they often deliver superior value through accurate data, reduced operational risks, and improved efficiency.
9. Customer Support and Training
A good provider doesn’t just deliver services—they also support your team throughout the process. Look for an autonomous drone inspection system provider that offers:
- Onboarding and training programs
- Technical support
- Regular updates and maintenance
- Dedicated account management
An aviation certified UAV inspection company with strong customer support ensures a smooth and hassle-free experience.
10. Reputation and Reliability
Finally, consider the provider’s reputation in the market. A trustworthy autonomous drone inspection system provider will have:
- Positive client reviews
- Strong industry presence
- Transparent communication
- Consistent service quality
Reliability is key, especially when your operations depend on timely and accurate inspections.
Conclusion
Choosing the right autonomous drone inspection system provider is a strategic decision that can significantly impact your business operations. By focusing on experience, certifications, technology, safety, and scalability, you can find a partner that aligns with your goals.
Always prioritize working with an aviation certified UAV inspection company to ensure compliance, safety, and high-quality results. With the right provider, you can leverage drone technology to enhance efficiency, reduce costs, and gain valuable insights for better decision-making.
Investing time in selecting the right partner today will set your business up for long-term success in the era of intelligent and autonomous inspections.

Disagreements over wages and compensation can create tension in the workplace, affecting both morale and productivity. Employees may feel undervalued, while employers may face confusion over legal obligations or contract interpretations. Addressing these issues constructively requires clear communication, a solid understanding of labor laws, and a willingness to find mutually agreeable solutions. Approaching such disputes with a focus on collaboration rather than confrontation often leads to faster resolution and helps preserve professional relationships. Open dialogue, thorough documentation, and a calm, fact-based approach are key components in navigating these situations effectively.
In more complex cases, where negotiations become challenging or legal questions arise, seeking professional guidance can be essential. Consulting with experienced professionals, such as the best employment lawyers in Colorado Springs, can provide clarity on rights, obligations, and potential courses of action. Their expertise helps ensure that any resolution is fair, legally sound, and minimizes long-term conflict. By combining proactive communication with informed support, both employees and employers can resolve compensation concerns efficiently while maintaining a respectful and professional work environment.
Common Causes of Wage Disputes
Pay disagreements usually stem from misunderstandings, administrative errors, or misinterpretations of contracts. Some of the most prevalent issues include:
- Overtime Pay Violations: Employers must pay eligible employees extra for hours worked beyond the standard workweek. Failure to do so is not only unfair but illegal.
- Misclassification of Employees: Designating a worker as an independent contractor rather than an employee can deprive them of overtime, benefits, and protections.
- Unpaid Work Hours: Any period an employee performs duties, including required breaks or pre-shift preparations, should be compensated.
- Illegal Deductions: Without written consent or legal justification, taking money out of an employee’s paycheck can quickly lead to disputes and possible legal action.
Recognizing these root causes enables quicker, more effective resolution before disagreements escalate into lawsuits or regulatory investigations.
Legal Framework and Employee Rights
The balance between fair compensation and business sustainability is grounded in federal and state labor regulations. The Fair Labor Standards Act (FLSA) sets minimum wage rates and overtime pay rules, while state laws may add additional protections. In recent years, oversight has grown stricter. For example, the Equal Employment Opportunity Commission (EEOC) has secured hundreds of millions in settlements for affected workers, reflecting the seriousness with which regulatory bodies are treating wage violations.
Employers must remain vigilant about compliance, as even honest mistakes can be costly. Employees, on the other hand, have the right to pursue unpaid wages and must be informed about ways to file complaints or grievances. Detailed, accurate record-keeping is essential for resolving disputes efficiently.
Effective Communication Strategies
Clear, proactive communication is at the heart of resolving compensation issues, regardless of the workplace environment. Employers should spell out wage policies in employee handbooks, offer regular compensation reviews, and ensure payroll records match hours worked. Creating a non-retaliatory space where concerns are considered without prejudice builds trust and avoids miscommunication.
- Share all relevant compensation details at the start of employment and whenever changes are made.
- Invest in up-to-date time tracking and payroll systems to maintain accuracy.
- Invite candid feedback and provide clear steps for employees to report discrepancies.
Sustained transparency goes a long way toward preventing disputes.
Mediation as a Resolution Tool
When direct discussions fail to resolve a pay dispute, mediation offers a productive alternative to court proceedings. Mediation brings all parties to the table with a neutral third party to facilitate solutions tailored to their specific needs rather than enforce a winner-loser outcome. It generally costs less, remains confidential, and can help mend strained professional relationships. The Illinois Department of Labor, for example, has established dedicated mediation units to help parties resolve wage issues before litigation, significantly reducing strain and expense.
State agencies often make mediation available as a first step before official complaints advance to litigation.
Case Study: Successful Mediation in Wage Disputes
Noteworthy examples abound for how structured mediation and settlement can resolve longstanding wage disputes. In December 2025, the Attorney General of Washington, D.C., announced a large settlement with a construction company regarding wage shortfalls and worker misclassification. The company agreed to compensate affected employees and pay additional penalties to the state. This case illustrates that active intervention and negotiation can recover owed wages while encouraging future compliance. It is an excellent example of how constructive solutions yield fair outcomes for both sides.
Preventive Measures for Employers
- Consistently review internal policies and procedures to ensure compliance with all current regulations at both the federal and state levels.
- Train managers and HR staff in the basics of wage law and the importance of proper job classification.
- Establish confidential channels for employees to report wage issues without fear of retaliation.
By embedding these strategies into daily business practices, companies reduce risks and reinforce a supportive workplace culture.
Conclusion
Effectively resolving wage and compensation disputes requires a combination of legal awareness, fair management practices, and open communication. Mediation can be a powerful tool, helping to avoid litigation and preserve dignified working relationships. Above all, preventive measures and respect for employees’ rights are the best defenses against future disputes, cultivating a positive environment for all.
-

 Blog1 month ago
Simpcit6: Redefining Simplicity in a Complex World
-

 Technology5 months ago
YourAssistantLive com: The Future of Smart Digital Assistance
-

 food6 months ago
Calamariere: How to Perfectly Prepare at Home
-

 Blog6 months ago
Baddi Hub: An Emerging Industrial and Business Hotspot
-

 Health4 months ago
Nerovet AI Dentistry: Enhancing Patient Experience and Treatment Outcomes Dental Care
-

 Technology1 month ago
Voomixi com: The Digital Platform Redefining Online Interaction
-

 HomeImprovment5 months ago
Acamento: How Finishing Techniques Define a Building’s Style
-

 Technology5 months ago
Anonibs: The Trending Anonymous Image Board Platform