It is the time of the year where decorating happens the most!
Fall season slows us down and makes us appreciate the bursting of colors of nature. The cool breeze and the shorter days, oh what is there not to love about the fall?
It is the perfect time to embellish our homes that makes us want to stay indoors as we spend and create loving memories with our families.
Elegant Creators has fall garland ideas that you can try at home (invite your kids, too for a fun family craft time!)
Paper Leaf Fall Garland
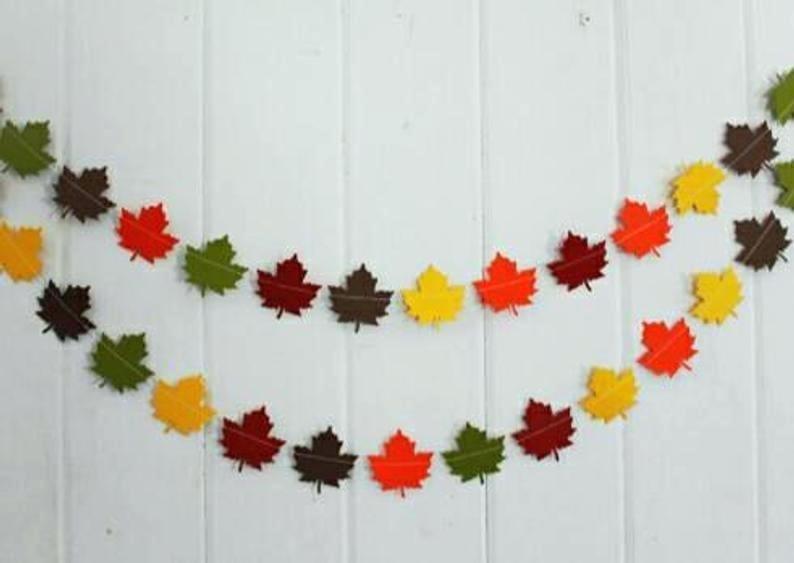
What you need:
- Card stock, fall colors (example: dark green, yellow, brown, maroon)
- String/twine
- Scissors
- Fall leaf template
- Tape
How to:
- Print fall leaf template onto the colored card stock of your choice
- Cut the leaf pattern inside the black lines
- Cut all the leaf patterns you need for the lengths of the garland
- Once you have the desired number of leaves, start taping into the string or twine
Faux Leather Acorn Garland
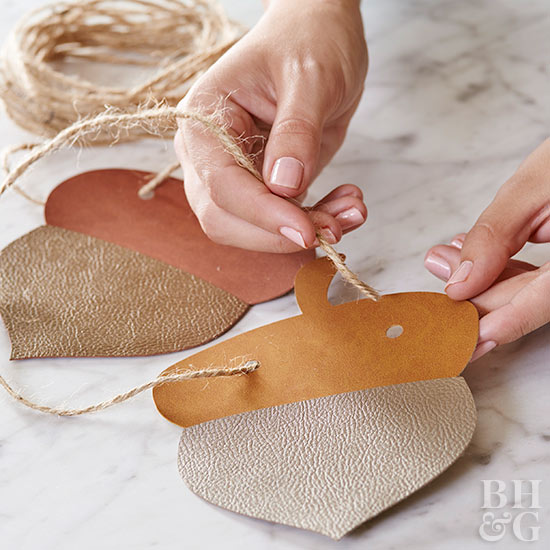
What you need:
- Faux leather sheets (various shades)
- Acorn template/stencil
- Twine
- Hole punch
- Glue
- Pencil
- Scissors
How to:
- Pick four to six color combinations of leather sheet for your acorn
- Trace the acorn shape onto the leather sheet using a template or stencil (if you don’t have a template or stencil, you may create your own by drawing a generic acorn shape)
- Cut the traced patterns (now you have faux leather acorns)
- Using a different shade of faux leather, trace and cut another acorn (this time, just the body of the acorn leaving the top part and the stem)
- Cut an equal number of the body or bottom of acorns from the whole acorn shapes you have previously made
- Glue the acorn bottoms to the leather acorn
- Let dry
- Punch two holes (2.5 to 3 inches apart) under the stem
- Once you completed the desired number of acorns, lay them flat in your preferred alternate color order
- Insert the twine through the holes
- Leave enough length of twine in both ends for hanging
Apple Print Bunting/Garland
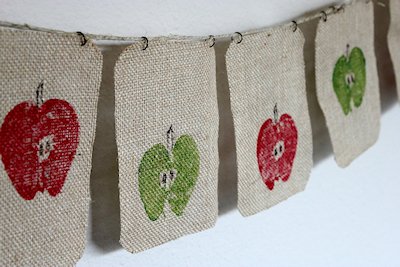
What you need:
- Burlap
- Paper
- Scissors
- Paint brush
- Fabric paint (green and red)
- Apple (cut in half, horizontally)
- Black or brown painters pen
- Pencil
- String or twine
- Jump rings
How to:
- Make your bunting template by drawing a rectangular shape onto the paper and cut
- Trace the rectangle shape onto the burlap and cut
- Create rectangular burlap bunting as many as you need
- Brush the apple halves with green and red paint
- Press or stamp the apples onto the burlap
- Let dry
- Add details (seeds and short stem) using a painters pen
- Once paint is completely dry, attach jump rings in either sides of each burlap bunting
- Thread the string or twine in the jump rings
- Leave extra lengths of twine for hanging
Facebook Comments